Car scratches are an all-too-common nuisance for vehicle owners, often caused by everyday occurrences like careless parking, debris on the road, or even simple accidents. The moment you see those unsightly marks on an otherwise pristine car can invoke a wave of frustration and desperation. Perhaps it was a friend who borrowed your car and accidentally scratched it while navigating a tight parking space or maybe you discovered a fresh scratch after a day spent in a busy parking lot. Those marks can be disheartening, distracting not only from your car’s aesthetic appeal but also from its overall value.
Fortunately, there is a silver lining—DIY scratch removal techniques. By taking matters into your own hands, you can not only save a significant amount of money but also reclaim the beauty of your vehicle without the need for costly professional services. These cost-effective methods empower you to address scratches quickly and effectively, allowing you to maintain your pride and joy in its best condition. Plus, the satisfaction of completing the repair yourself brings a sense of accomplishment that adds to the emotional reward.
So, let’s delve into the world of DIY car scratch removal, where saving money and preserving your car’s beauty go hand in hand.
Tools and Materials for DIY Scratch Removal
When it comes to DIY scratch removal, having the right tools and materials at your disposal can make all the difference. Below is a comprehensive list that will equip you to tackle scratches effectively:
Essential Tools and Materials:
-
Wet-Sanding Kits
Wet-sanding is a preferred method for deeper scratches. A wet-sanding kit typically includes various grits of sandpaper (from around 800 to 3000 grit) and a sanding block for even pressure. Make sure to use water as a lubricant to prevent damage to your vehicle’s paint.

Wet-sanding kits for scratch removal, including different grits of sandpaper. -
Polishing Compounds
Products like Meguiar’s Ultimate Compound or Chemical Guys VSS can help restore the shine to your car’s finish. These compounds remove a thin layer of clear coat to hide light scratches.

Polishing compounds for car scratch repair. -
Microfiber Cloths
These are essential for applying compounds and wiping off excess materials safely without scratching the paint. Look for soft and lint-free options.

Microfiber cloths used for car detailing. -
Touch-Up Paint
A small bottle of touch-up paint specific to your car’s color code can effectively fill in deeper scratches. Expect to spend about $15 to $20 for a paint pen or bottle.

Touch-up paint bottles for cars. -
Cutting Compounds or Repair Wax
Useful for buffing out minor scratches, cutting compounds generally cost between $10 to $15 and are designed to correct paint imperfections.

Cutting compounds for buffing scratches. -
Polishing Pads
Foam or microfiber buffing pads can be used with polishing compounds to apply even pressure. A standard polishing pad costs around $10.

Polishing pads for scratch repair. -
Masking Tape
This will protect areas surrounding the scratch while you work, ensuring you don’t accidentally buff or paint unwanted sections.

Masking tape for car repair. -
Rubbing Alcohol or Paint Thinner
To clean the scratch area before beginning, use rubbing alcohol to remove wax, dirt, and grease, allowing for better adhesion of the compounds and paint.

Rubbing alcohol and paint thinner used for cleaning prior to scratch repair.
With these tools and materials, you’ll be well-equipped to tackle a variety of scratches on your vehicle, ensuring that you can maintain its aesthetic appeal and value over time.
Assessing Scratch Depth
Understanding the depth of a scratch on your vehicle’s surface is crucial for determining the appropriate repair method. Here are some effective strategies for assessing scratches:
-
Visual Inspection
Begin with a close examination of the scratch. Use good lighting to observe its characteristics. Scratches that only affect the clear coat are generally superficial and can often be polished out, while deeper scratches that expose the paint or primer require more extensive repair.
-
Fingernail Test
Gently run your fingernail over the scratch. If your nail catches in the groove, it indicates a deeper scratch that may necessitate professional help. This method is a quick and straightforward way to gauge severity. Clear coat scratches usually feel smooth under your fingernail, while those that affect the paint or primer will have defined edges you can feel.
-
Light Reflection Method
Shine a flashlight on the scratch at various angles. Watch how light reflects off the surface. Deeper scratches will appear darker, as they disrupt the paint’s integrity, while lighter, shallow scratches typically reflect light better.
-
Assessment with Detailing Clay
Using detailing clay can also help in evaluating the scratch depth. Rub the clay over the scratch; if it catches or grabs at certain points, the scratch may be deeper than a mere surface issue.
When to DIY vs. Seek Professional Help
It is essential to recognize when to tackle a repair yourself and when to defer to professionals. Light scratches that are confined to the clear coat are often manageable with polishing compounds or touch-up paint. However, deeper scratches that expose the metal or primer can lead to corrosion if not treated by a professional. Refer to guides such as those from Consumer Reports and AutoZone for step-by-step instructions tailored to different scratch severities. Knowing the scratch depth not only informs your repair strategy but can also save you time, money, and further damage to your vehicle’s finish.
Cost Comparison Table for DIY vs Professional Repairs
When addressing the repair of car paint scratches, understanding the cost differences between DIY and professional services is crucial. Below is a comprehensive comparison of potential expenses related to each option:
| Cost Elements | DIY Costs (Approx.) | Professional Costs (Approx.) | Potential Savings |
|---|---|---|---|
| Scratch Assessment | $0 | $0 | $0 |
| Touch-Up Paint | $15 – $20 | $50 – $150 | Up to $135 |
| Polishing Pads | $10 | $50 – $75 | Up to $65 |
| Cutting Compound or Repair Wax | $10 – $15 | $30 – $75 | Up to $60 |
| Total per Scratch | $35 – $45 | $130 – $300 | Up to $265 |
This table illustrates that DIY repairs can be significantly cheaper, often costing less than a third of what professional services might charge. On average, DIY repairs for scratches can run between $35 and $45, whereas professional services may range from $130 to $300 for the same type of repair, leading to substantial potential savings for DIYers.
Step-by-Step Scratch Removal Techniques
If your car has gotten scratched, there’s no need to panic. With some basic tools and patience, you can remove many scratches yourself through various techniques. We will explore three popular methods: wet-sanding, buffing, and applying touch-up paint. Each method is effective depending on the scratch’s depth and location. Here are detailed instructions, along with safety tips to ensure a successful repair.
1. Wet-Sanding
Wet-sanding is ideal for deeper scratches that can’t be easily buffed out. It works by removing a thin layer of clear coat, blending the scratch with the surrounding paint. Follow these steps:
- Gather Your Materials: You’ll need 2000-3000 grit sandpaper, a spray bottle with water, and a microfiber cloth.
- Preparation: Clean the scratched area thoroughly to remove dirt and debris.
- Wet the Area: Lightly spray the scratched surface with water to lubricate it.
- Sand Carefully: Wrap the sandpaper around a sanding block to apply even pressure. Sand the scratch gently, moving in straight lines, until the scratch is less visible.
- Clean Up: Wipe the area with a wet microfiber cloth to remove sanding residue.
Safety Tips: Always wear gloves and goggles to protect your skin and eyes from debris. Work in a well-ventilated, shaded area to prevent overheating of the paint.
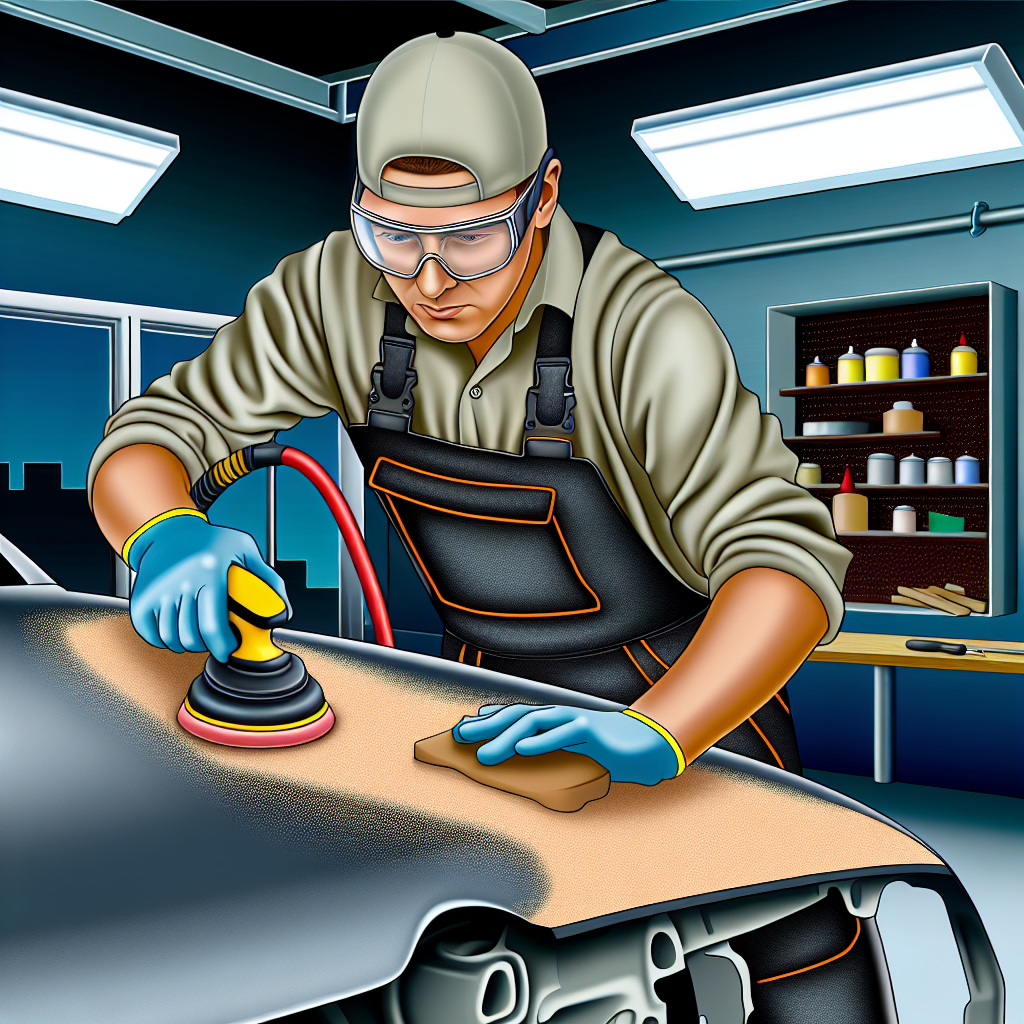
2. Buffing
Buffing helps restore shine and eliminate light scratches. It is best performed after wet-sanding. Here’s how to do it:
- Tools Needed: A dual-action polisher, buffing pads, and a quality polishing compound (like Meguiar’s Ultimate Compound).
- Clean the Surface: Ensure the area is free from dust and debris.
- Apply Compound: Put a small amount of polishing compound on the buffing pad.
- Buff the Area: Start on a low speed and gradually increase, using circular motions. Move in a consistent pattern until the surface is smooth and shiny.
- Finalize: Wipe any excess compound away with a microfiber towel.
Safety Tips: Use a respirator when buffing to avoid inhaling dust. Keep the polisher moving to prevent burning through the clear coat.
3. Touch-Up Paint
If the scratch is deep and exposes the primer or bare metal, touch-up paint is necessary. Here’s how to apply it effectively:
- Find the Right Color: Obtain touch-up paint that matches your car’s color code.
- Clean the Area: Use rubbing alcohol to clean the scratch before applying paint.
- Apply with Precision: Use a fine brush or paint pen for precise application. Avoid over-filling the scratch.
- Let it Cure: Allow the paint to dry fully, following the manufacturer’s instructions. If needed, apply a clear coat over the touch-up paint for a smooth finish.
Safety Tips: Work in a well-ventilated area, away from children and pets. Prevent any contact with fresh paint to avoid skin irritation.
By following these step-by-step techniques, you can rejuvenate your car’s appearance while saving money on professional repairs. Remember, patience is key to achieving a flawless finish!
Expert Insights on Scratch Repair Myths
Adding credibility to our discussion on DIY scratch repair techniques are insights from various automotive experts. According to John Davis, a veteran auto detailer interviewed by Autoweek, “90% of ‘scratches’ people see are just transferred paint from another object and can be clayed off. Real scratches need correct compounding, not home remedies.” This highlights the importance of understanding scratch severity rather than resorting to DIY solutions that could worsen damage.
Furthermore, experts from Consumer Reports warn that misconceptions abound regarding scratch removal methods. They state, “Toothpaste can repair scratches” is not only misleading but can also dull the vehicle’s clear coat. Light scratches may respond to polishing compounds, yet deeper ones necessitate professional intervention to avert further damage.
Lastly, a representative from Car and Driver emphasizes the fragility of modern automotive paint systems. They note, “Modern paint is thinner and more eco-friendly but also more fragile,” underscoring the need for care when undertaking scratch repairs. These insights serve as a reminder that while DIY methods can be cost-effective, they must be approached with the right knowledge and tools to avoid exacerbating existing issues.
Conclusion
In conclusion, DIY scratch removal offers an accessible and cost-effective solution for vehicle owners looking to restore their car’s aesthetic appeal without breaking the bank. As highlighted throughout this article, assessing scratch depth, using the right tools, and employing effective techniques—such as wet-sanding and buffing—are essential for successful repairs. These methods not only save you hundreds of dollars compared to professional services but also empower you to take control of your vehicle’s maintenance.
While it’s crucial to understand the limitations of DIY methods, many scratches can be managed with patience and the right approach. Remember, light scratches are often no match for a determined DIYer equipped with the right materials, and even deeper scratches can yield satisfactory results with careful execution.
So, do not hesitate to put these practices to the test on your own vehicle. With some time and effort, you can achieve professional-looking results, allowing you to take pride in the upkeep of your car. Embrace the challenge of DIY scratch removal—your car and your wallet will thank you!
Additional Resources and References
For readers looking to expand their knowledge on car maintenance and paint repair techniques, here are some authoritative resources:
-
BASF Refinish Training Center
This site provides professional training in automotive paint repair, covering color matching, blending, and advanced techniques. Emphasis is placed on safety and proper tool usage. -
Automotive Paint Repair and Maintenance Guide – SAE International
Offers technical papers and standards on automotive refinishing, including best practices for surface preparation and paint application. -
DIY Auto Scratch Removal: Techniques and Safety – Popular Mechanics
A step-by-step guide for DIY scratch repair, detailing essential tools and safety tips. -
Professional vs. DIY Auto Body Repair – Car and Driver
Provides a detailed comparison of professional and DIY repair outcomes and costs. -
DIY Car Scratch Repair: How to Fix Scratches at Home – Consumer Reports
Notes that while DIY solutions may be suitable for lighter scratches, deeper ones often require professional help. -
Cost-Benefit Analysis: DIY vs Professional Scratch Repair – Auto Body Review
An analysis showing the savings and potential pitfalls of DIY approaches compared to professional services.
These resources can help you gain a better understanding of DIY scratch repair techniques and when it may be more beneficial to seek professional assistance.
DIY Car Scratch Repair Techniques
Car scratches are an all-too-common nuisance for vehicle owners, often caused by everyday occurrences like careless parking, debris on the road, or even simple accidents. Seeing those unsightly marks on an otherwise pristine car can be disheartening, distracting not only from its visual appeal but also from its overall value. Fortunately, there is a silver lining—DIY scratch removal techniques. By taking matters into your own hands, you can not only save a significant amount of money through effective car maintenance but also reclaim the aesthetic integrity of your vehicle without the need for costly professional paint repair services. These cost-effective methods empower you to address scratches quickly and effectively, allowing you to maintain your pride and joy in its best condition. Plus, the satisfaction of completing the repair yourself brings a sense of accomplishment that adds to the emotional reward. So, let’s delve into the world of DIY car scratch repair techniques, where saving money and preserving your car’s beauty go hand in hand.
Tools and Materials for DIY Scratch Removal
When it comes to DIY scratch removal, having the right tools and materials at your disposal can make all the difference in automotive detailing. Below is a comprehensive list that will equip you to tackle scratches effectively:
Essential Tools and Materials:
- Wet-Sanding Kits
Wet-sanding is a preferred method for deeper scratches and a crucial part of car maintenance. A wet-sanding kit typically includes various grits of sandpaper (from around 800 to 3000 grit) and a sanding block for even pressure. Make sure to use water as a lubricant to prevent damage to your vehicle’s paint. - Polishing Compounds
Products like Meguiar’s Ultimate Compound or Chemical Guys VSS can help restore the shine to your car’s finish. These compounds remove a thin layer of clear coat to hide light scratches and are vital for paint repair. - Microfiber Cloths
These are essential for applying compounds and wiping off excess materials safely without scratching the paint. Look for soft and lint-free options suitable for automotive detailing. - Touch-Up Paint
A small bottle of touch-up paint specific to your car’s color code can effectively fill in deeper scratches. Expect to spend about $15 to $20 for a paint pen or bottle specific to your car maintenance needs. - Cutting Compounds or Repair Wax
Useful for buffing out minor scratches, cutting compounds generally cost between $10 to $15 and are a necessity for addressing paint imperfections. - Polishing Pads
Foam or microfiber buffing pads can be used with polishing compounds to apply even pressure during paint repair. A standard polishing pad costs around $10. - Masking Tape
This will protect areas surrounding the scratch while you work, ensuring you don’t accidentally buff or paint unwanted sections during your car scratch repair. - Rubbing Alcohol or Paint Thinner
To clean the scratch area before beginning, use rubbing alcohol to remove wax, dirt, and grease, allowing for better adhesion of the compounds and paint during your automotive detailing process.
With these tools and materials, you’ll be well-equipped to tackle a variety of scratches on your vehicle, ensuring that you can maintain its aesthetic appeal and value over time while excelling in car maintenance practices.
Assessing Scratch Depth
Understanding the depth of a scratch on your vehicle’s surface is crucial for determining the appropriate car scratch repair technique. Here are some effective strategies for assessing scratches:
- Visual Inspection
Begin with a close examination of the scratch. Use good lighting to observe its characteristics. Scratches that only affect the clear coat are generally superficial and can often be polished out, while deeper scratches that expose the paint or primer require more extensive car maintenance. - Fingernail Test
Gently run your fingernail over the scratch. If your nail catches in the groove, it indicates a deeper scratch that may necessitate professional help. This method is a quick and straightforward way to gauge severity. Clear coat scratches usually feel smooth under your fingernail, while those that affect the paint or primer will have defined edges you can feel. - Light Reflection Method
Shine a flashlight on the scratch at various angles. Watch how light reflects off the surface. Deeper scratches will appear darker, as they disrupt the paint’s integrity, while lighter, shallow scratches typically reflect light better. - Assessment with Detailing Clay
Using detailing clay can also help in evaluating the scratch depth. Rub the clay over the scratch; if it catches or grabs at certain points, the scratch may be deeper than a mere surface issue.
When to DIY vs. Seek Professional Help
It is essential to recognize when to tackle a repair yourself and when to defer to professionals. Light scratches that are confined to the clear coat are often manageable with polishing compounds or touch-up paint. However, deeper scratches that expose the metal or primer can lead to corrosion if not treated by a professional. Refer to guides such as those from Consumer Reports and AutoZone for step-by-step instructions tailored to different scratch severities. Knowing the scratch depth not only informs your repair strategy but can also save you time, money, and further damage to your vehicle’s paint.
Cost Comparison Table for DIY vs Professional Repairs
When addressing the repair of car paint scratches, understanding the cost differences between DIY and professional services is crucial. Below is a comprehensive comparison of potential expenses related to each option:
| Cost Elements | DIY Costs (Approx.) | Professional Costs (Approx.) | Potential Savings |
|---|---|---|---|
| Scratch Assessment | $0 | $0 | $0 |
| Touch-Up Paint | $15 – $20 | $50 – $150 | Up to $135 |
| Polishing Pads | $10 | $50 – $75 | Up to $65 |
| Cutting Compound or Repair Wax | $10 – $15 | $30 – $75 | Up to $60 |
| Total per Scratch | $35 – $45 | $130 – $300 | Up to $265 |
This table illustrates that DIY repairs can be significantly cheaper, often costing less than a third of what professional services might charge. On average, DIY repairs for scratches can run between $35 and $45, whereas professional services may range from $130 to $300 for the same type of repair, leading to substantial potential savings for DIYers.
Step-by-Step Scratch Removal Techniques
If your car has gotten scratched, there’s no need to panic. With some basic tools and patience, you can remove many scratches yourself through various techniques. We will explore three popular methods: wet-sanding, buffing, and applying touch-up paint. Each method is effective depending on the scratch’s depth and location. Here are detailed instructions, along with safety tips to ensure a successful repair.
1. Wet-Sanding
Wet-sanding is ideal for deeper scratches that can’t be easily buffed out. It works by removing a thin layer of clear coat, blending the scratch with the surrounding paint. Follow these steps:
- Gather Your Materials: You’ll need 2000-3000 grit sandpaper, a spray bottle with water, and a microfiber cloth.
- Preparation: Clean the scratched area thoroughly to remove dirt and debris.
- Wet the Area: Lightly spray the scratched surface with water to lubricate it.
- Sand Carefully: Wrap the sandpaper around a sanding block to apply even pressure. Sand the scratch gently, moving in straight lines, until the scratch is less visible.
- Clean Up: Wipe the area with a wet microfiber cloth to remove sanding residue.
Safety Tips: Always wear gloves and goggles to protect your skin and eyes from debris. Work in a well-ventilated, shaded area to prevent overheating of the paint.
2. Buffing
Buffing helps restore shine and eliminate light scratches. It is best performed after wet-sanding. Here’s how to do it:
- Tools Needed: A dual-action polisher, buffing pads, and a quality polishing compound (like Meguiar’s Ultimate Compound).
- Clean the Surface: Ensure the area is free from dust and debris.
- Apply Compound: Put a small amount of polishing compound on the buffing pad.
- Buff the Area: Start on a low speed and gradually increase, using circular motions. Move in a consistent pattern until the surface is smooth and shiny.
- Finalize: Wipe any excess compound away with a microfiber towel.
Safety Tips: Use a respirator when buffing to avoid inhaling dust. Keep the polisher moving to prevent burning through the clear coat.
3. Touch-Up Paint
If the scratch is deep and exposes the primer or bare metal, touch-up paint is necessary. Here’s how to apply it effectively:
- Find the Right Color: Obtain touch-up paint that matches your car’s color code.
- Clean the Area: Use rubbing alcohol to clean the scratch before applying paint.
- Apply with Precision: Use a fine brush or paint pen for precise application. Avoid over-filling the scratch.
- Let it Cure: Allow the paint to dry fully, following the manufacturer’s instructions. If needed, apply a clear coat over the touch-up paint for a smooth finish.
Safety Tips: Work in a well-ventilated area, away from children and pets. Prevent any contact with fresh paint to avoid skin irritation.
By following these step-by-step techniques, you can rejuvenate your car’s appearance while saving money on professional repairs. Remember, patience is key to achieving a flawless finish!
Expert Insights on Scratch Repair Myths
Adding credibility to our discussion on DIY scratch repair techniques are insights from various automotive experts. According to John Davis, a veteran auto detailer interviewed by Autoweek, “90% of ‘scratches’ people see are just transferred paint from another object and can be clayed off. Real scratches need correct compounding, not home remedies.” This highlights the importance of understanding scratch severity rather than resorting to DIY solutions that could worsen damage.
Furthermore, experts from Consumer Reports warn that misconceptions abound regarding scratch removal methods. They state, “Toothpaste can repair scratches” is not only misleading but can also dull the vehicle’s clear coat. Light scratches may respond to polishing compounds, yet deeper ones necessitate professional intervention to avert further damage.
Lastly, a representative from Car and Driver emphasizes the fragility of modern automotive paint systems. They note, “Modern paint is thinner and more eco-friendly but also more fragile,” underscoring the need for care when undertaking scratch repairs. These insights serve as a reminder that while DIY methods can be cost-effective, they must be approached with the right knowledge and tools to avoid exacerbating existing issues.
Conclusion
In conclusion, DIY scratch removal offers an accessible and cost-effective solution for vehicle owners looking to restore their car’s aesthetic appeal without breaking the bank. As highlighted throughout this article, assessing scratch depth, using the right tools, and employing effective techniques such as wet-sanding and buffing are essential for successful repairs. These methods not only save you hundreds of dollars compared to professional services but also empower you to take control of your vehicle’s maintenance.
While it’s crucial to understand the limitations of DIY methods, many scratches can be managed with patience and the right approach. Remember, light scratches are often no match for a determined DIYer equipped with the right materials, and even deeper scratches can yield satisfactory results with careful execution.
So, do not hesitate to put these practices to the test on your own vehicle. With some time and effort, you can achieve professional-looking results, allowing you to take pride in the upkeep of your car. Embrace the challenge of DIY scratch removal—your car and your wallet will thank you!