Are those unsightly scratches on your vehicle making you cringe? You’re not alone. Many car owners face the daunting decision between expensive professional repairs, which can run upwards of $850 to $1,000, and the DIY alternative — a path that can save you a significant amount of cash. Imagine paying just $50 to $100 to restore your car’s luster and keep your wallet intact.
In this guide, we delve into effective DIY scratch removal methods that not only spare you from breaking the bank but also empower you to tackle your car care with confidence. From understanding the different techniques to honing your skills with practical tips, we’ll show you how to achieve results that rival professional services.
So, whether you’re a seasoned DIY enthusiast or a newbie looking to spruce up your vehicle, let’s explore the world of scratch repair that puts your car back to its original glory without the hefty price tag.
User Adoption Trends in Car Scratch Repair Services
User adoption trends indicate that many car owners are now leaning towards professional scratch repair services. Here are the key insights:
- Preference for Professional Services: A significant portion of consumers (89%) prefer to have cosmetic repairs, such as scratch removal, done by professionals at dealerships during maintenance appointments. This shows a strong desire for convenience and trust in professional care over DIY methods.
- Declining DIY Repairs: As vehicle designs and paint technologies become more sophisticated, the data reveals a decline in DIY scratch repairs. Many car owners feel that attempting these repairs themselves can lead to unsatisfactory results. As a result, they are choosing to seek professional help.
- Cost Considerations: While DIY scratch repair kits are typically more affordable, ranging from $20 to $50, many consumers are still willing to pay for professional services due to the perceived quality and durability of the repair. Professional scratch repairs generally cost between $150 and $500, depending on the severity of the damage.
- Quality and Longevity: DIY methods may suffice for minor surface scratches, but they often lack the lasting results and finish quality provided by professionals. Experts use advanced materials and techniques, making their services the preferred option for more significant or complex repairs.
In summary, while DIY scratch repair methods can be a budget-friendly solution for minor issues, many car owners appreciate the expertise, quality, and convenience that professional services offer, especially when dealing with more severe damage.
| Product | Effectiveness | Ease of Use | Cost |
|---|---|---|---|
| Meguiar’s Ultimate Compound | Highly effective for medium to deep scratches; great for achieving a clear finish. | Requires some technique; best with a polishing pad or buffer. | Around $15-$20 |
| ScratchX | Effective for minor scratches and blemishes; may take multiple applications for best results. | Easy to use, suitable for beginners. | Approximately $10-$15 |
| Chemical Guys VSS | Effective on light to moderate scratches; combines polishing and finishing. | User-friendly; no special tools required. | About $15-$20 |
This table allows readers to compare various scratch removal products available in the market based on their effectiveness, ease of use, and cost, helping them make informed decisions. Each product has distinct features that cater to different types and severities of scratches, enhancing the DIY experience and outcomes for car owners.
Wet-Sanding Technique: Your Path to a Flawless Finish
Wet-sanding is a popular technique for automotive enthusiasts aimed at removing imperfections in a car’s paint finish and achieving a smooth surface. This method not only reduces the visibility of scratches but also prepares the surface for polishing, which can enhance the overall appearance of your car. Below, we explore the benefits of wet-sanding and provide a step-by-step process for DIY enthusiasts looking to try their hand at this effective technique.
Benefits of Wet-Sanding
- Achieves a Glass-Smooth Finish: Utilizing finer sandpaper grits, wet-sanding can create a smooth and even surface that is ideal for subsequent polishing.
- Reduces Paint Damage: Since wet-sanding involves using water, it reduces the heat generated from friction, minimizing the risk of damaging the paint layers.
- Versatile Application: Whether addressing deep scratches, blemishes, or preparing for a clear coat, wet-sanding is an adaptable method suitable for various repair tasks.
Step-by-Step Wet-Sanding Process
- Gather Your Materials: You will need sandpaper in varying grits (usually starting around 1200 up to 4000), a spray bottle filled with water, a microfiber cloth, and a polishing compound.
- Clean the Area: Before you begin, ensure the surface is clean and dry. Wash with soap and water to remove dirt and debris, as these can cause scratches during the sanding process.
- Wet the Surface: Spray the area to be sanded with water to lubricate the surface. This will help to avoid any potential damage and ensures smooth sanding.
- Start Sanding: Using your chosen sandpaper grit, gently sand the scratched area in a slow, circular motion. Keep the surface wet to ensure the sandpaper glides easily over the paint. Take your time to avoid excessive pressure.
- Check Your Progress: Periodically wipe away the residue and check your progress. You should aim for a uniform appearance, free of scratches and dull spots.
- Increase Grit Gradually: Once you have sanded with a coarser grit, move to finer grits, repeating the wetting and sanding process until you achieve the desired smoothness.
- Polish the Surface: After wet-sanding, dry the area completely. Apply a polishing compound to a microfiber cloth or a polishing pad attached to a power drill. Polish the area in a circular motion to bring back the shine to your car’s paint.
- Final Wipe Down: Use a clean microfiber cloth to wipe away any remaining polish and reveal a beautifully smooth finish.
Wet-sanding may seem intimidating at first, but with practice, it can be a valuable skill for DIY car enthusiasts, ultimately leading to professional-looking results in your scratch repair efforts.
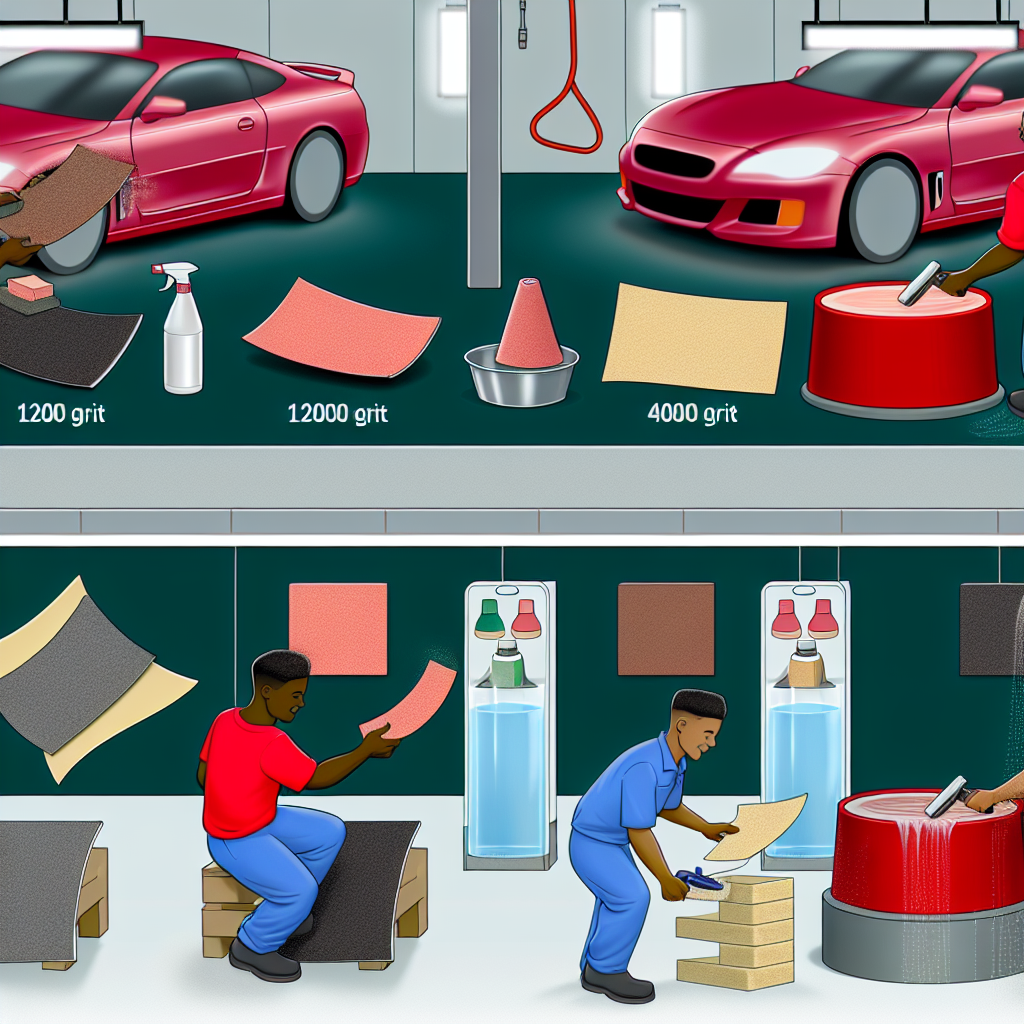
This image illustrates the wet-sanding process, detailing the various sandpaper grits used and the different smoothing stages involved in achieving a glass-smooth finish on automotive paint.

This close-up image shows the detailing of the wet-sanding process, focusing on the techniques and tools involved in achieving a polished result.
Common Pitfalls in DIY Scratch Repairs
While attempting DIY scratch repairs can seem like a cost-effective solution, many car owners fall prey to common pitfalls that can lead to unsatisfactory results or even further damage. Below are frequently encountered mistakes along with expert insights and practical solutions to enhance your repair efforts.
1. Misjudging the Depth of the Scratch
Repairing scratches without accurately assessing their depth can lead to improper repairs. Shallow scratches affecting just the clear coat can often be polished away. However, deeper scratches that reach the paint or metal require a different approach. Automotive expert Chad Zani mentions,
“If your fingernail catches in the scratch, touch-up paint or professional help is safest.”
This emphasizes the importance of understanding the scratch’s depth before proceeding with any repair. source
2. Using Incorrect Products
Using the wrong repair products can make the problem worse instead of fixing it. Products meant for different materials can be harmful. Experts suggest always choosing products specifically designed for automotive paint jobs. source
3. Skipping Surface Preparation
A common mistake is neglecting the cleaning process before starting repairs. Dirty surfaces can trap debris beneath repair materials, leading to an uneven finish that is not only unappealing but also might worsen the scratch. Solution: Always clean the scratched area thoroughly with soap and water and then dry completely before beginning any repair work. source
4. Over-Polishing the Scratch
Polishing is necessary, but overdoing it can degrade the paint layers, exposing the car to potential damage. Use gentle, circular polishing motions and stop once the scratch appears less visible. source
5. Rushing the Repair Process
DIY repair often takes more time than anticipated. Rushing can lead to mistakes like skipping drying times between applications. Patience is key in achieving a smooth finish. source
6. Neglecting to Protect the Repaired Area
After repairs, applying a quality wax or sealant can protect the area from new scratches and environmental damage. This can help maintain the integrity of your repair for longer. source
By heeding the advice of experts and carefully following necessary steps, you can not only avoid common DIY pitfalls but also achieve satisfactory results in repairing scratches on your vehicle. Remember to assess, choose the right products, prepare the surface, and protect your work to ensure the best possible outcomes.
Tools and Materials Needed for DIY Scratch Repair
Before you begin your DIY scratch repair, make sure you have the following tools and materials handy to achieve the best results:
- Microfiber Cloths: Essential for cleaning surfaces and polishing after repair. They prevent lint and scratches.
- Touch-Up Paint: This should match your car’s color for seamless repairs. Always check your vehicle’s color code.
- Squeegee: Helps in applying products evenly and removing excess paint or polish.
- Sandpaper: Use various grits, usually ranging from 1200 to 4000 for wet-sanding, to smooth out scratches.
- Polishing Compound: Necessary for restoring shine after performing repairs and for achieving a professional finish.
- Spray Bottle: Filled with water for wet-sanding; it helps to lubricate the surface and minimize heat from friction.
- Paint Adhesive: Often used to ensure that touch-up paint adheres well to the vehicle’s surface.
- Clear Coat: To protect your repair and add a glossy finish, giving your car’s surface a like-new appearance.
Having these tools and materials ready will streamline your repair process and help ensure satisfactory results.
Conclusion
In conclusion, DIY scratch removal methods offer an accessible and cost-effective solution to restore your vehicle’s appearance without the financial burden of professional repairs. By employing techniques such as wet-sanding and utilizing the right tools and products, you not only enhance your skills but also gain a sense of satisfaction by transforming your car into a pristine state. These methods empower you to manage minor scratches, maintain your vehicle’s value, and ultimately take charge of your car care.
Personal anecdotes can illustrate the practical benefits of DIY scratch repair. For instance, Sarah, a car enthusiast on a budget, shared her experience of using Meguiar’s Ultimate Compound on her favorite vehicle. She was surprised at how simple yet effective the process was, restoring her car’s shine while saving hundreds of dollars in repair costs.
Similarly, Tom, who once relied on professionals for repairs, decided to attempt a DIY scratch repair himself after reading through various automotive forums. He was thrilled when he successfully restored his car’s hood and couldn’t believe the transformation — it felt like he had brand new paint.
These stories highlight not just the savings involved, but the sense of achievement that comes from mastering your vehicle’s care. We encourage you to try your hand at these DIY methods and experience the benefits firsthand. Whether you encounter challenges or achieve remarkable results, your journey in scratch repair is valuable. Share your DIY experiences with us! Connect with fellow car enthusiasts by commenting below on your successes, hurdles, and the techniques that worked best for you. Let’s inspire each other to keep our vehicles looking their best!
Cost Comparisons: DIY Scratch Repairs vs. Professional Services
When it comes to repairing scratches on your vehicle, one of the most significant factors to consider is cost. Let’s break down the financial implications of choosing DIY methods versus hiring professional services.
DIY Scratch Repair Costs
Engaging in a DIY scratch repair can be incredibly cost-effective. As referenced earlier, a complete DIY scratch repair typically costs around $50 to $100. This includes acquiring the necessary materials such as sandpaper, polishing compounds, and microfiber cloths. These tools can often be used for multiple repairs, reducing the overall cost per use, especially if you maintain a regular car care routine.
Professional Repair Costs
In contrast, seeking professional assistance for scratch repairs can set you back considerably more. As noted, services for medium damage typically range from $850 to $1,000. This hefty price tag accounts for not only labor but also the specialized equipment and expertise that professionals bring to the table. For extensive damages, or when utilizing advanced techniques, these costs can escalate even further, making professional services a significant investment for vehicle owners.
Potential Savings
The stark difference in cost clearly illustrates the potential savings of DIY scratch repairs. By choosing to repair scratches on your own, you can save anywhere from $750 to $950 compared to professional repairs. This substantial amount can be reinvested into your car or put towards other important expenses. Furthermore, many DIY repair kits and materials are designed for ease of use and can yield professional-grade results, especially for minor scratches.
Conclusion
In conclusion, the financial implications show that opting for DIY scratch repair not only provides a cost-effective solution but also equips you with valuable skills in vehicle maintenance. Embracing these methods empowers you to take control of your car’s appearance without incurring the high costs associated with professional services.
For those looking to preserve their budget while maintaining their vehicles, DIY scratch repairs are not just a feasible option; they are a smart financial choice.
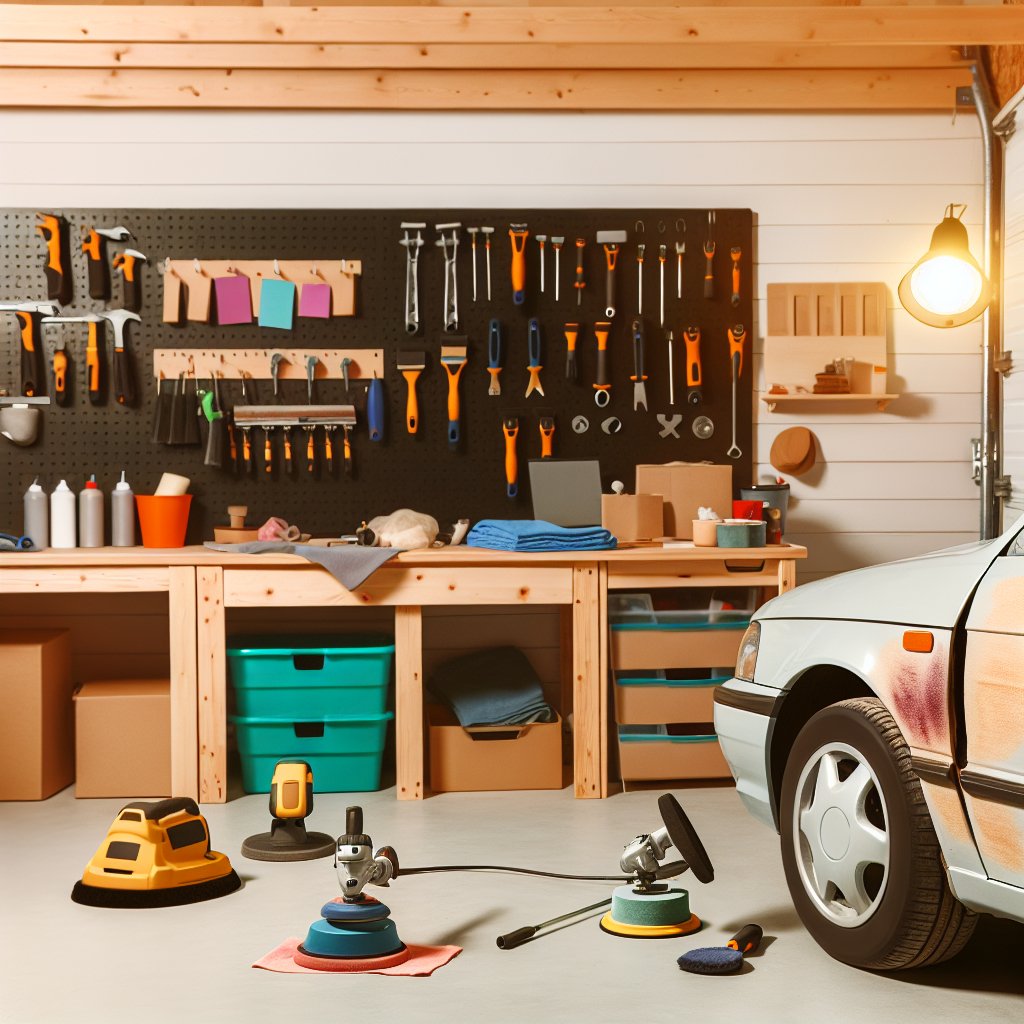
This image represents a friendly DIY garage setting filled with basic automotive tools, showcasing a car undergoing scratch repair to inspire readers visually.
| Method | Cost Range | Effectiveness | Additional Considerations |
|---|---|---|---|
| DIY Scratch Repair | $50 – $100 | Good for minor scratches; requires skill | Cost-effective long-term solution |
| Professional Scratch Repair | $850 – $1,000 | Highly effective for severe damage | Quick and reliable; skilled labor required |
This table provides a cost comparison between DIY and professional scratch repair methods to help readers understand the financial implications of their choices. By weighing the costs and effectiveness, car owners can make informed decisions about whether to tackle repairs themselves or seek professional help.
DIY Scratch Removal: Automotive Repair Techniques for Every Enthusiast
Are those unsightly scratches on your vehicle making you cringe? You’re not alone. Many car owners face the daunting decision between expensive professional repairs, which can run upwards of $850 to $1,000, and the DIY alternative — a path that can save you a significant amount of cash. Imagine paying just $50 to $100 to restore your car’s luster and keep your wallet intact. In this guide, we delve into effective DIY scratch removal methods, innovative automotive repair techniques, and key points in paint scratch maintenance that not only spare you from breaking the bank but also empower you to tackle your car care with confidence. From understanding the different methods to honing your skills with practical tips, we’ll show you how to achieve results that rival professional services. So, whether you’re a seasoned DIY enthusiast or a newbie looking to spruce up your vehicle, let’s explore the world of scratch repair that puts your car back to its original glory without the hefty price tag.
Common Pitfalls in DIY Scratch Repairs: Avoiding Mistakes in Automotive Repair Techniques
While attempting DIY scratch repairs can seem like a cost-effective solution, many car owners fall prey to common pitfalls that can lead to unsatisfactory results or even further damage. Below are frequently encountered mistakes along with expert insights and practical solutions to enhance your repair efforts.
1. Misjudging the Depth of the Scratch
Repairing scratches without accurately assessing their depth can lead to improper repairs. Shallow scratches affecting just the clear coat can often be polished away. However, deeper scratches that reach the paint or metal require a different approach. Automotive expert Chad Zani mentions,
“If your fingernail catches in the scratch, touch-up paint or professional help is safest.”
This emphasizes the importance of understanding the scratch’s depth before proceeding with any repair. [source]
2. Using Incorrect Products
Using the wrong repair products can make the problem worse instead of fixing it. Products meant for different materials can be harmful. Experts suggest always choosing products specifically designed for automotive paint jobs. [source]
3. Skipping Surface Preparation
A common mistake is neglecting the cleaning process before starting repairs. Dirty surfaces can trap debris beneath repair materials, leading to an uneven finish that is not only unappealing but also might worsen the scratch. Solution: Always clean the scratched area thoroughly with soap and water and then dry completely before beginning any repair work. [source]
4. Over-Polishing the Scratch
Polishing is necessary, but overdoing it can degrade the paint layers, exposing the car to potential damage. Use gentle, circular polishing motions and stop once the scratch appears less visible. [source]
5. Rushing the Repair Process
DIY repair often takes more time than anticipated. Rushing can lead to mistakes like skipping drying times between applications. Patience is key in achieving a smooth finish. [source]
6. Neglecting to Protect the Repaired Area
After repairs, applying a quality wax or sealant can protect the area from new scratches and environmental damage. This can help maintain the integrity of your repair for longer. [source]
By heeding the advice of experts and carefully following necessary steps, you can not only avoid common DIY pitfalls but also achieve satisfactory results in repairing scratches on your vehicle. Remember to assess, choose the right products, prepare the surface, and protect your work to ensure the best possible outcomes.
Conclusion
In conclusion, DIY scratch removal methods offer an effective solution for paint scratch maintenance that not only preserves your vehicle’s appearance but also teaches you valuable skills in automotive repair techniques. By employing these methods, you empower yourself to manage minor scratches, maintain your vehicle’s value, and take charge of your car care.
We encourage you to try your hand at these DIY methods and experience the benefits firsthand. Whether you encounter challenges or achieve remarkable results, your journey in scratch repair is valuable. Share your DIY experiences with us! Connect with fellow car enthusiasts by commenting below on your successes, hurdles, and the techniques that worked best for you.