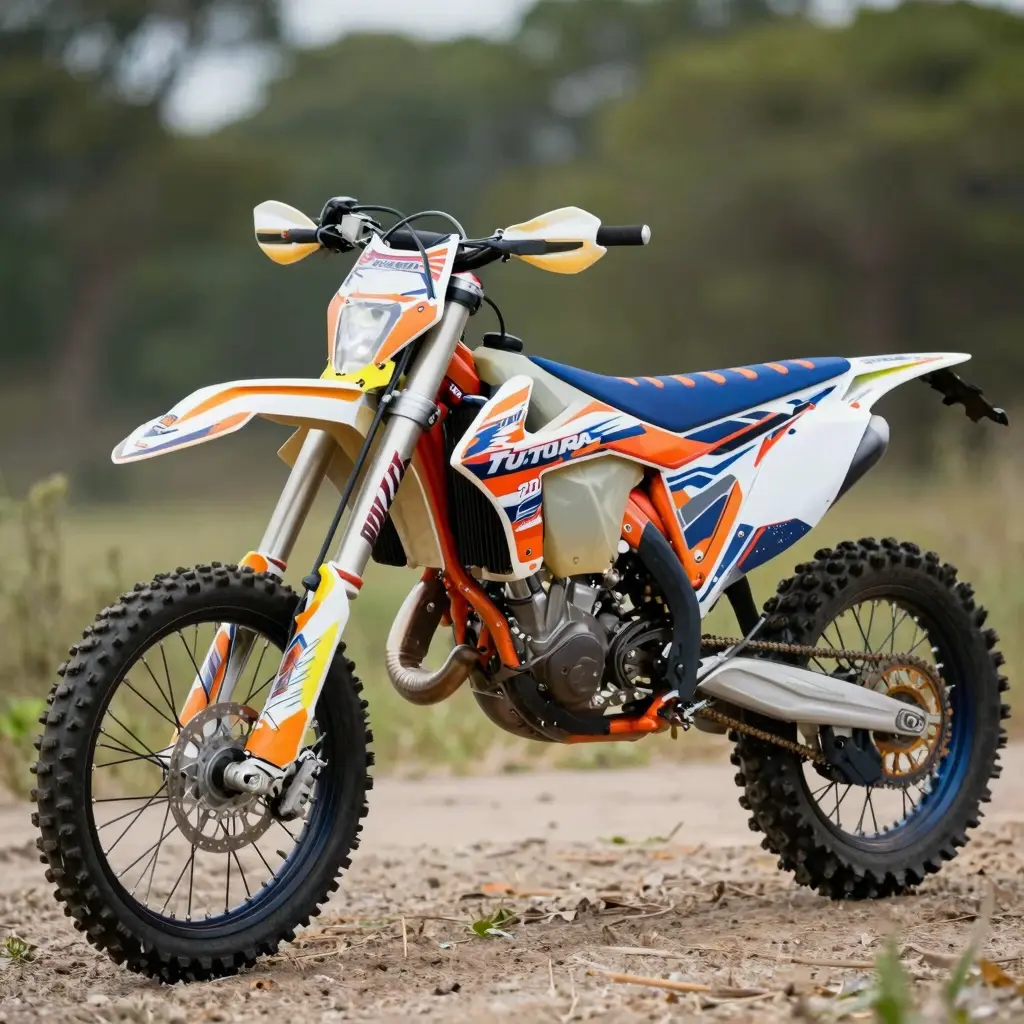
When it comes to personalizing your motorcycle, dirt bike graphics play a pivotal role in defining not just the aesthetic, but also the identity of your ride. A striking graphic design can transform a standard-looking dirt bike into a unique embodiment of your personality and style. This artful customization is not only about making your bike visually appealing; it’s a form of self-expression that can set you apart on the trails or tracks. Furthermore, the right graphics can enhance your bike’s visibility, making it not just beautiful, but safer as well. Whether you’re an avid racer or a casual rider, exploring options for motorcycle customization can elevate your biking experience to new heights. From vibrant colors to intricate patterns, embracing dirt bike graphics helps you create a personalized statement while potentially hinting at your approach to motorcycle repair and maintenance. Dive into the world of graphics and see how a simple change can have a powerful visual impact!
-
Vinyl: The primary material for dirt bike graphics, vinyl is chosen for its durability, flexibility, and diverse design options. High-quality vinyl is often used in two types: standard glossy vinyl and advanced laminate vinyl, which provides extra protection against UV rays and abrasions.
-
Adhesives: A strong adhesive ensures that the graphics cling well to the bike’s surface and withstand environmental factors. The most common adhesives are pressure-sensitive adhesives that provide reliable bonding without the need for additional heat or water activation.
-
Printing Inks: Specialized printing inks are employed, particularly eco-solvent or UV inks that are resistant to fading and damage from the elements. These inks are crucial for vibrant colors and intricate designs that stand out on the track.
-
Lamination: To enhance durability, graphics may have a lamination layer applied. This can be a glossy or matte finish that provides additional protection to the printed inks and vinyl surface against scratches and weather.
-
Grip Tape: While not a graphic per se, grip tape is often used in conjunction with graphics to ensure the rider maintains control. This material is typically placed in areas where grip is crucial, complementing the overall design.
For more information about specific products, you can check out our dirt bike graphics collection tailored to meet your customization needs.
By understanding these materials, motorcycle owners and technicians can make informed choices when applying graphics to enhance the look and performance of their bikes.
| Graphic Type | Durability | Cost | Installation Time |
|---|---|---|---|
| Pre-Printed | Moderate | Low ($50-$150) | Quick (1-2 hours) |
| Custom | High | Moderate to High ($100-$300) | Moderate (2-4 hours) |
| DIY | Variable (Quality of materials used) | Low to Moderate ($20-$100) | Varies (2-6 hours depending on skill level) |
Breakdown of Graphic Types:
-
Pre-Printed Graphics:
-
Durability: Generally offers moderate durability and can withstand typical wear and tear.
-
Cost: Usually the most affordable option.
-
Installation Time: Relatively quick to install, making it a great option for quick upgrades.
-
Custom Graphics:
-
Durability: High-quality custom graphics tend to be more durable as they use better materials.
-
Cost: Typically pricier due to the customization process.
-
Installation Time: Takes longer to install, as they may require more care during application to ensure a perfect fit.
-
DIY Graphics:
-
Durability: This depends on the quality of the materials chosen; some may not stand the test of time.
-
Cost: Generally low, but can increase depending on specific materials and tools needed.
-
Installation Time: Can take considerable time, especially for those who are not adept at graphic application.
For more insights into dirt bike graphics options, be sure to check out custom dirt bike graphics for various designs and ideas.
If you have any questions about the application or selection process of dirt bike graphics, feel free to explore more resources on this topic.
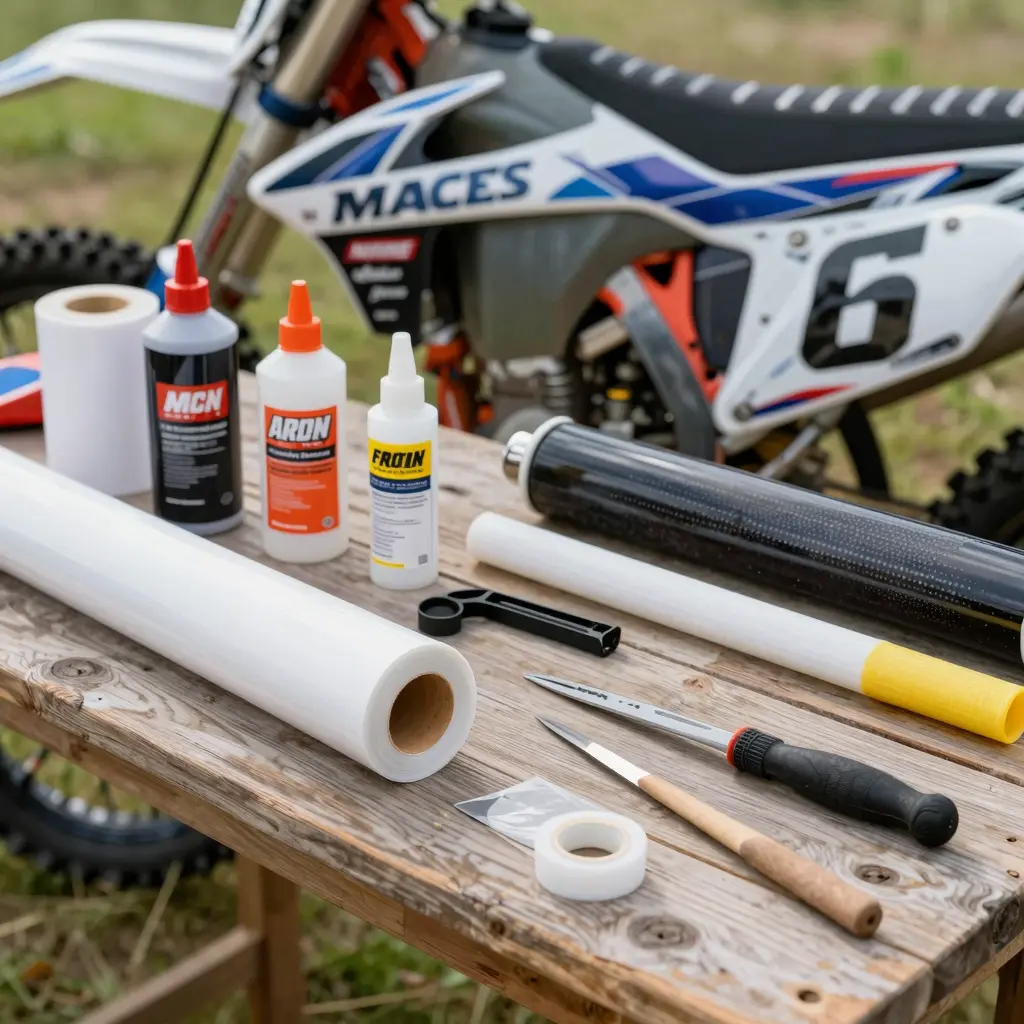
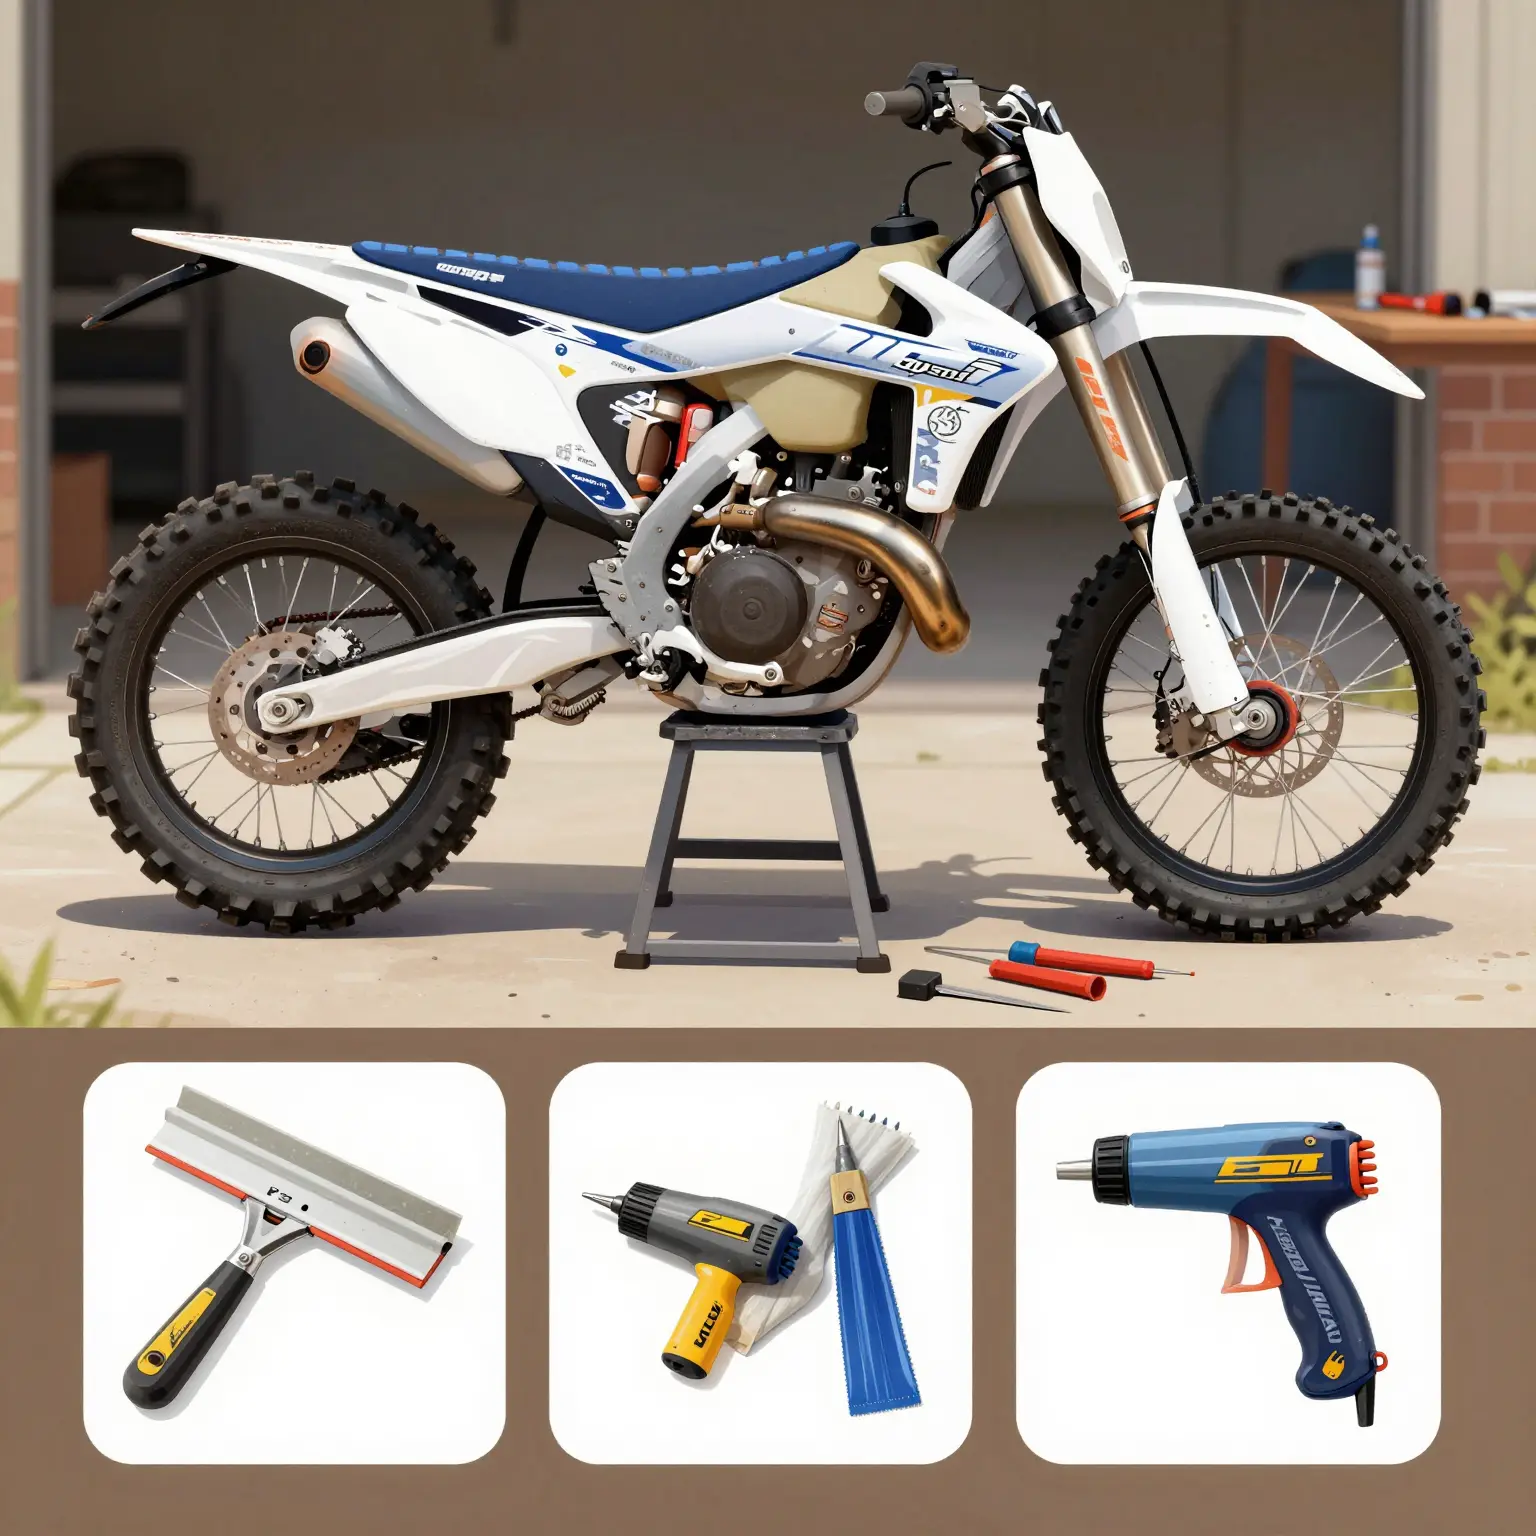
Essential Tools for Applying Dirt Bike Graphics
Applying graphics to your dirt bike not only enhances its appearance but also protects the underlying plastic from scratches and UV damage. To achieve a professional finish, having the right tools is crucial. Here is a detailed list of essential tools needed for this task:
1. Squeegees
A flexible squeegee is one of the most important tools for applying dirt bike graphics. It helps in pressing the graphic onto the surface, ensuring there are no bubbles or wrinkles. Look for a squeegee with a felt or soft edge to avoid scratches on the graphic.
2. Heat Gun
A heat gun is vital for applying graphics, especially around curves and edges. The heat softens the material, making it more pliable and easier to conform to the shape of your bike. This tool is also handy for shrinking any excess material once the graphics are applied, helping to create a taut, professional look.
3. Utility Knife
A sharp utility knife is essential for trimming excess vinyl after application. It allows for precise cuts that help create clean lines around edges and contours of the motorcycle plastics. Always ensure your blade is sharp for the best results.
4. Rubbing Alcohol or Cleaning Solution
Before applying the graphics, it’s important to clean the surface thoroughly. Rubbing alcohol or a specialized cleaning solution can remove any dirt, oils, or residues that may prevent proper adhesion.
5. Measuring Tape
Using a measuring tape ensures that your graphics are aligned correctly on your dirt bike. It helps in positioning them symmetrically, giving a professional finish.
6. Application Solution (Optional)
Some professionals use an application solution (a mixture of water and a small amount of soap) to help slide the graphics into the desired position before squeegeeing out the bubbles. However, be careful with this approach, as it can sometimes weaken the adhesive.
Importance of Using the Right Tools
Using the right tools is imperative for avoiding common issues like air bubbles, misalignment, and graphics shifting over time. A professional finish enhances the bike’s look and longevity, making your investment in these tools worthwhile. For a selection of high-quality graphics, check out our custom graphics options.
By equipping yourself with these tools, you’ll ensure that your dirt bike graphics application is seamless and visually appealing, allowing you to enjoy your rides in style!
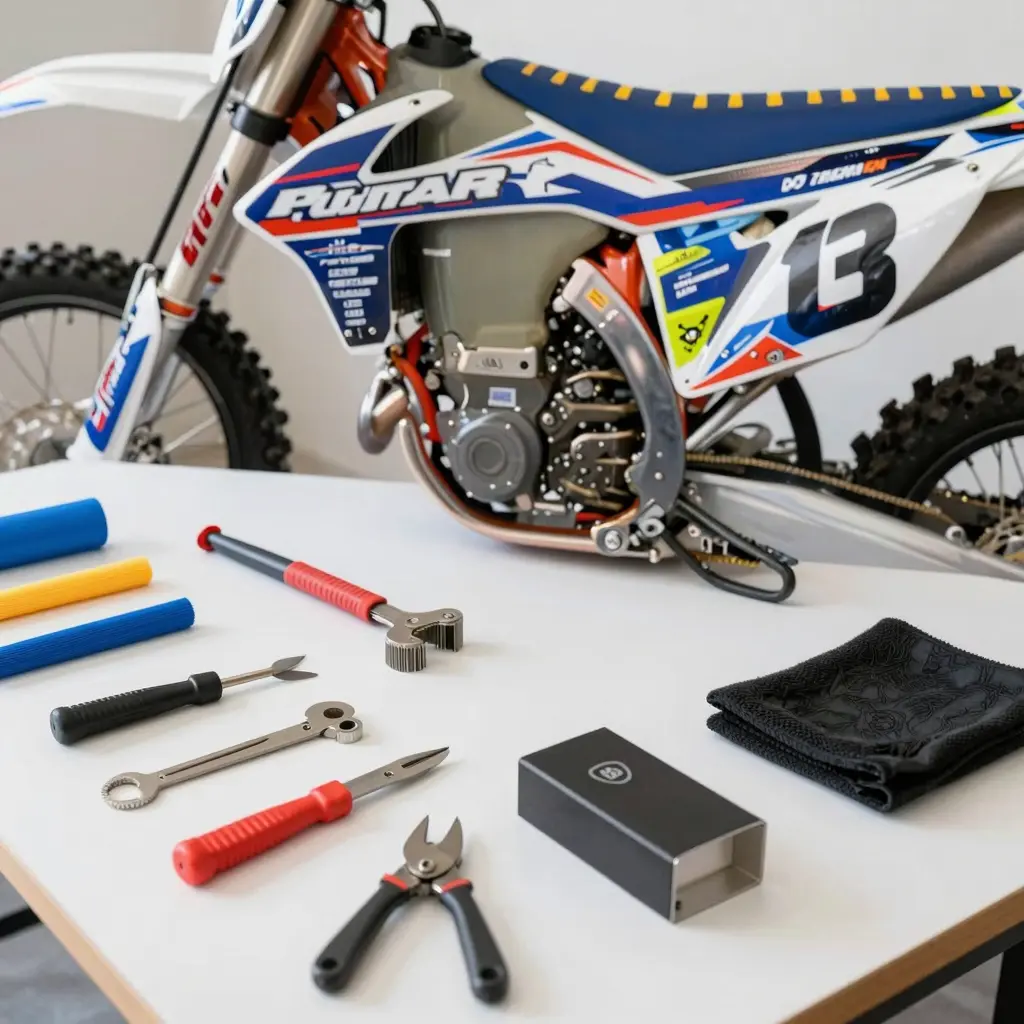
Step-by-Step Guide to Applying Dirt Bike Graphics
Dirt bike graphics not only enhance the visual appeal of your bike but also serve to protect its surfaces. Applying these graphics may seem like a daunting task, but with this detailed, step-by-step guide, you can apply them like a pro. Here’s how to properly apply dirt bike graphics, including preparation, application, finishing touches, and curing tips.
1. Preparation
Before you begin, ensure that you have all the tools and materials ready:
-
Tools Needed:
-
Squeegee or plastic scraper
-
Heat gun or hairdryer
-
Clean cloth or microfiber towel
-
Isopropyl alcohol or adhesive remover
-
Gloves (optional but recommended)
-
Clean the Surface:
Start by cleaning the dirt bike thoroughly. Use soap and water to remove mud and dirt. Once cleaned, wipe the surface using isopropyl alcohol to remove any remaining grease or residues. It’s essential to work on a clean surface to ensure the adhesive sticks well.
You can learn more about dirt bike graphics that suit your style and preferences.
2. Applying the Graphics
Now that your bike is clean and prepared, it’s time to apply the graphics:
-
Peel Off the Backing:
Gently peel off the backing of your graphic. Be careful not to touch the adhesive side to avoid contaminants that may affect adhesion. -
Position the Graphic:
Align the graphic on the bike without pressing it down initially. Ensure that it’s positioned correctly according to the design. -
Use a Squeegee:
Start applying the graphic from the center outward using the squeegee. This method helps prevent air bubbles from forming underneath the graphic. If bubbles do form, gently lift the graphic and press down again to eliminate them. -
Heat for Better Adhesion:
Once the graphic is in place, use a heat gun or hairdryer to warm the surface slightly. This helps the adhesive bond better to the surface. Be careful not to overheat, as this can damage the graphics.
3. Finishing Touches
-
Trim Excess Material:
If there are any parts of the graphic that extend beyond the edges, use a sharp knife or scissors to trim them carefully. This ensures a clean and professional look. -
Re-Apply Heat:
Once trimmed, go over the edges of the graphics with the heat gun again. This step helps to secure the graphic firmly onto the bike and makes the edges less likely to lift over time.
4. Curing Tips
Curing the graphics is crucial for ensuring they last:
-
Let it Set:
Allow the graphics to cure for at least 24-48 hours before exposing them to harsh weather conditions or washing. This waiting period allows the adhesive to fully set.
For more installation tips, check out Dirt Bike Empire’s guide. -
Avoid Water Exposure:
During the curing period, avoid washing the bike or exposing it to rain, as moisture can weaken the adhesive bond. -
Check for Adhesion:
After a few days, check the adhesion of the graphics by running your fingers along the edges. If they lift, you may need to re-heat and press them back down.
Conclusion
Applying dirt bike graphics can significantly change the look of your bike and is a relatively simple task when done correctly. Following this step-by-step guide ensures not only a successful application but also longevity for your new graphics. Whether you’re an enthusiastic rider or a professional technician, proper installation will make your dirt bike stand out on the track or trail. Happy riding!
Common Mistakes to Avoid When Applying Dirt Bike Graphics
When it comes to applying dirt bike graphics, avoiding common pitfalls can lead to a better finish and longevity of the decals. Here are some mistakes to steer clear of:
-
Improper Surface Preparation
Make sure to thoroughly clean and de-grease the surface of your dirt bike before applying graphics. Dirt and oily residues prevent adhesive bonding, resulting in peeling graphics (learn more about proper preparation). -
Ignoring Air Bubbles
Not smoothing out air bubbles during application can spoil the appearance of the graphics. Use a squeegee or similar tool to push out air pockets for a clean, professional look. Leaving these bubbles can lead to premature peeling as well. -
Rushing the Application
Taking your time is crucial. Rushing can lead to misalignment, resulting in a crooked installation. Slow down to ensure precise placement and alignment to avoid redoing the work entirely (check out more application tips). -
Incorrect Heat Application
Applying heat incorrectly can lead to melted or warped graphics. It’s essential to use the right temperature, as too much heat can damage the adhesive and graphics, while too little can prevent proper adhesion. -
Neglecting to Test Adhesives
Using low-quality or incompatible adhesives can lead to graphics that don’t stick well. Always test adhesives on a small area to ensure compatibility with the graphic material and the bike surface.
By avoiding these common mistakes, you can achieve a high-quality finish that enhances the appearance and durability of your dirt bike graphics.
Best Practices for Applying Dirt Bike Graphics
Applying dirt bike graphics can transform your motorcycle’s appearance and enhance its performance. However, achieving a professional look requires careful preparation and adherence to best practices. Here is a summary of expert advice and techniques to improve your graphic application skills:
1. Prepare the Surface Thoroughly
Before applying any graphics, ensure the motorcycle surface is clean and free of dust, grease, and moisture. Experts recommend washing the bike with soapy water and using isopropyl alcohol for a final wipe to eliminate any residue. A thorough clean will help the graphics adhere better and last longer.
2. Gather the Right Tools
Having the right tools at hand can make the installation process smoother. Key tools include:
- Squeegee – For smooth application and to eliminate bubbles.
- Heat Gun – To warm stickers for better flexibility and adhesion.
- Exacto Knife – For precise cutting and trimming.
- Ruler – To measure and align graphics accurately.
3. Align and Apply Carefully
Take time to position the graphics accurately before sticking them down. Align graphics using reference points on your bike to ensure they sit correctly. A slight misalignment can lead to gaps or overlapping, compromising aesthetics. Remember to leave a small margin for adjustment as you begin to press down the graphics.
4. Use Proper Installation Techniques
Follow specific techniques to avoid common issues:
- Start from the center and work outwards to push air bubbles out.
- If you encounter bubbles, use a clean squeegee to smooth them out or gently puncture them with a pin and smooth the sticker down.
- Reheat areas that may lift or not adhere properly; this allows you to reposition them effectively.
5. Allow Time for Adhesion
After successful application, give the graphics time to set undisturbed. Experts recommend waiting at least 24 hours before using the motorcycle to ensure that the graphics adhere properly to the surface. This extra time also helps in conforming graphic edges to the bike’s contours.
Additional Resources
For more detailed guides, you can check out the following articles:
Conclusion
By following these best practices and incorporating expert techniques, you can achieve an impressive and professional finish when applying dirt bike graphics. Remember that preparation and patience are key to ensuring that your graphics not only look great but also last longer.
Importance of Graphics in Dirt Bikes
Motorcycle graphics significantly influence the aesthetics and overall functionality of the vehicle. As noted by experts in the field, “high-quality graphics not only enhance the motorcycle’s visual appeal but also reflect the rider’s individuality, making it a crucial aspect of personalization.” This sentiment resonates strongly within the motocross community, where a bike’s look can express the rider’s personal style and brand identity.
Furthermore, a technician emphasized that well-designed graphics can even enhance the market value of a bike, illustrating their dual role in both aesthetics and branding.
For further reading on custom dirt bike graphics, check out our collection of bike graphics available to add a unique touch to your ride.
Conclusion
Customizing your dirt bike with graphics is not just about aesthetics; it’s an opportunity to express your personality and style while enhancing the bike’s performance and visibility on the track. With a myriad of graphic options available, you can create a unique look that differentiates your ride from the rest, ensuring you stand out whether you’re racing, trail riding, or hitting the tracks.
Moreover, well-designed graphics can help provide better visibility and recognition, crucial for safety and branding if you are a professional rider or involved in competitions. By choosing high-quality materials and designs, you can ensure that your graphics withstand the tough outdoor elements while maintaining their vibrant appeal.
Ready to transform your dirt bike? Explore our extensive collection of dirt bike graphics today and discover the endless customization possibilities. Let your individuality shine through your bike’s design and make every ride a true reflection of who you are!